I had planned to release this version before we ended 2025, but because of life and work I get to celebrate the (happy) new year with an update.
Nothing fancy, I’ve just taken care of some of the bugs that I introduced in the last version, and some that have been with us since the beginning. A few properties that haven’t been in use for a while were also retired, and if the stars align that could reduce memory impact.
This fall I’ve been using Installomator a lot in Jamf Pro, Jamf School and Intune, and Installomator Mate has been a time saver for me, but bouncing between projects I realised that it was missing a method to clear all the selected labels. So that’s the new feature for 1.3.3.
I hope you’ll enjoy this update.
Happy new year! 🥂
Use the bult in updater or the download button below to get the latest version.
My vacation ends tomorrow, so I better release this update tonight.
All the shortcuts that were introduced in the last release – plus a few new to save, load and restore your settings – are now available from the menubar. As they should have been from the start.
I’ve also made some adjustments for the coming macOS-version, but unless you’re a developer you shouldn’t have to worry about them for at least a couple of weeks.
Finally I’ve managed to squash a few bugs. And expect a few others to have taken their place. Let me know if you find any.
Use the bult in updater or the download button below to get the latest version.
This update is long overdue, but that’s the life of a spare time developer working on more than one app.
Every now and then I want to know the installer type or Team ID of an app, which meant open Safari, navigate to Github and locate the label (and make sure I’m in the release branch).
With 1.3.0 I don’t have to do that any more, I just click the new info-button. I know it’s not pretty, but it’s a start.
But that’s not all.
About a week ago I got my first feature request, a keyboard shortcut for search. I don’t know why I never thought of it myself, and since it was such an easy fix I added shortcuts to export a script (command + E) and to copy it to the clipboard (command + option + E).
Thank’s for the suggestion Aaron.
If you have any requests, send me a mail at apps@hennig.nu, but wait, there’s…
… One more thing.
I recently helped a customer build an enrolment flow for macOS in Intune, where I used the mate extensively. But I realised there’s one thing missing. If you deploy a new computer and want to use Installomator to install apps, you first need to install Installomator.
I already have a handy script that installs the latest version from Github, but what if that could be included in the export from Installomator Mate? Now it can. Jus tick the checkbox and a bare bones version will be added before the Installomator recipes.
It may not be suitable for production, since it doesn’t contain any logging, but for testing ideas in a VM it should be more than enough.
Earlier this year I went to ARCtic Conference in Oulo, Finland (maybe I should have blogged about that?) and listened to a great talk about what games can teach us about accessibility by Klemens Strasser (he won yet another, well deserved, award at this year’s WWDC for his fabulous game The Art of Fauna, do check it out).
I knew I had neglected accessibility in Pluttifikation, but since I mainly created it for my daughter, that wasn’t my priority, I just wanted to get it on her phone before she’d learned all the tables by heart. But after the release, a few schools have added the app to their portfolio, so I knew I had to do better.
And today I’m doing better. The latest version introduces support for the Open Dyslexic font, and I’ve also removed some unnecessary animations in favour of built in UI. There are also some enhancements for dynamic type, but they are far from done. I hope it won’t take too long until I can release the next version with full support.
It’s been a while since I released my first app to App Store, and it also contained a pesky bug that sometimes would reveal the answer to a question befor you had a chance to try.
Being a Spare time developer (i.e, writing code when I’m not working and the family has been fed) it can be difficult to find the time needed to figure out something is broken. I knew the problem was with the animation, but I didn’t understand why it was firing when it wasn’t supposed to.
And it worked. I’m not even halfway through the book, and could not only identify the problem, but I also got rid of almost 70 percent of the code responsible to show the correct answer.
They say you shouldn’t push to prod on a Friday, but how about Sundays?
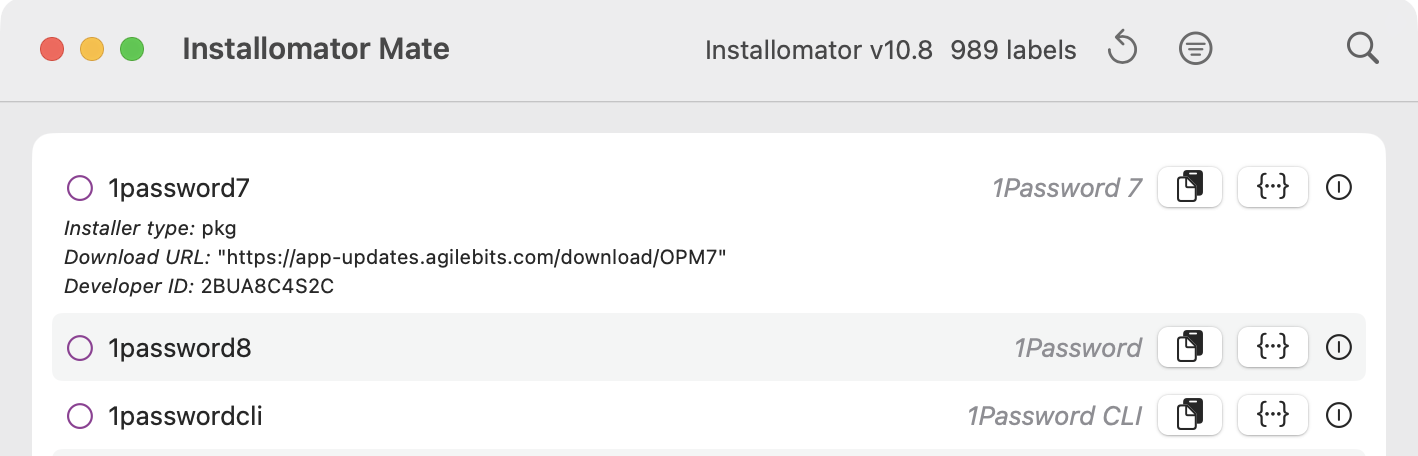
It’s been a while since the first public release, but I finally published an update to my tool Installomator Mate, that I built to simplify the process of creating script for use with Installomator.
New in this version is improved support for Swift Dialog, another tool I use frequently at work, and some minor interface changes.
I wanted to fix the UI glitch in my game Pluttifikation today, and realised I’d need to populate the Xcode preview with some mock data, unless I wanted to recompile the app for every change I made.
However, the problem is that I created a Player-class where all the properties that keep track of the players progress have a pre-configured value. On top of that, the PlayerView access’ Player as a subclass of the @Observable GameController-class that is injected in Environment.
The player’s progress – and name, if they choose to change it – is then saved to, and loaded from, UserDefaults. Simple and effective. The only thing I had to do to make the preview work was injecting the GameController like this:
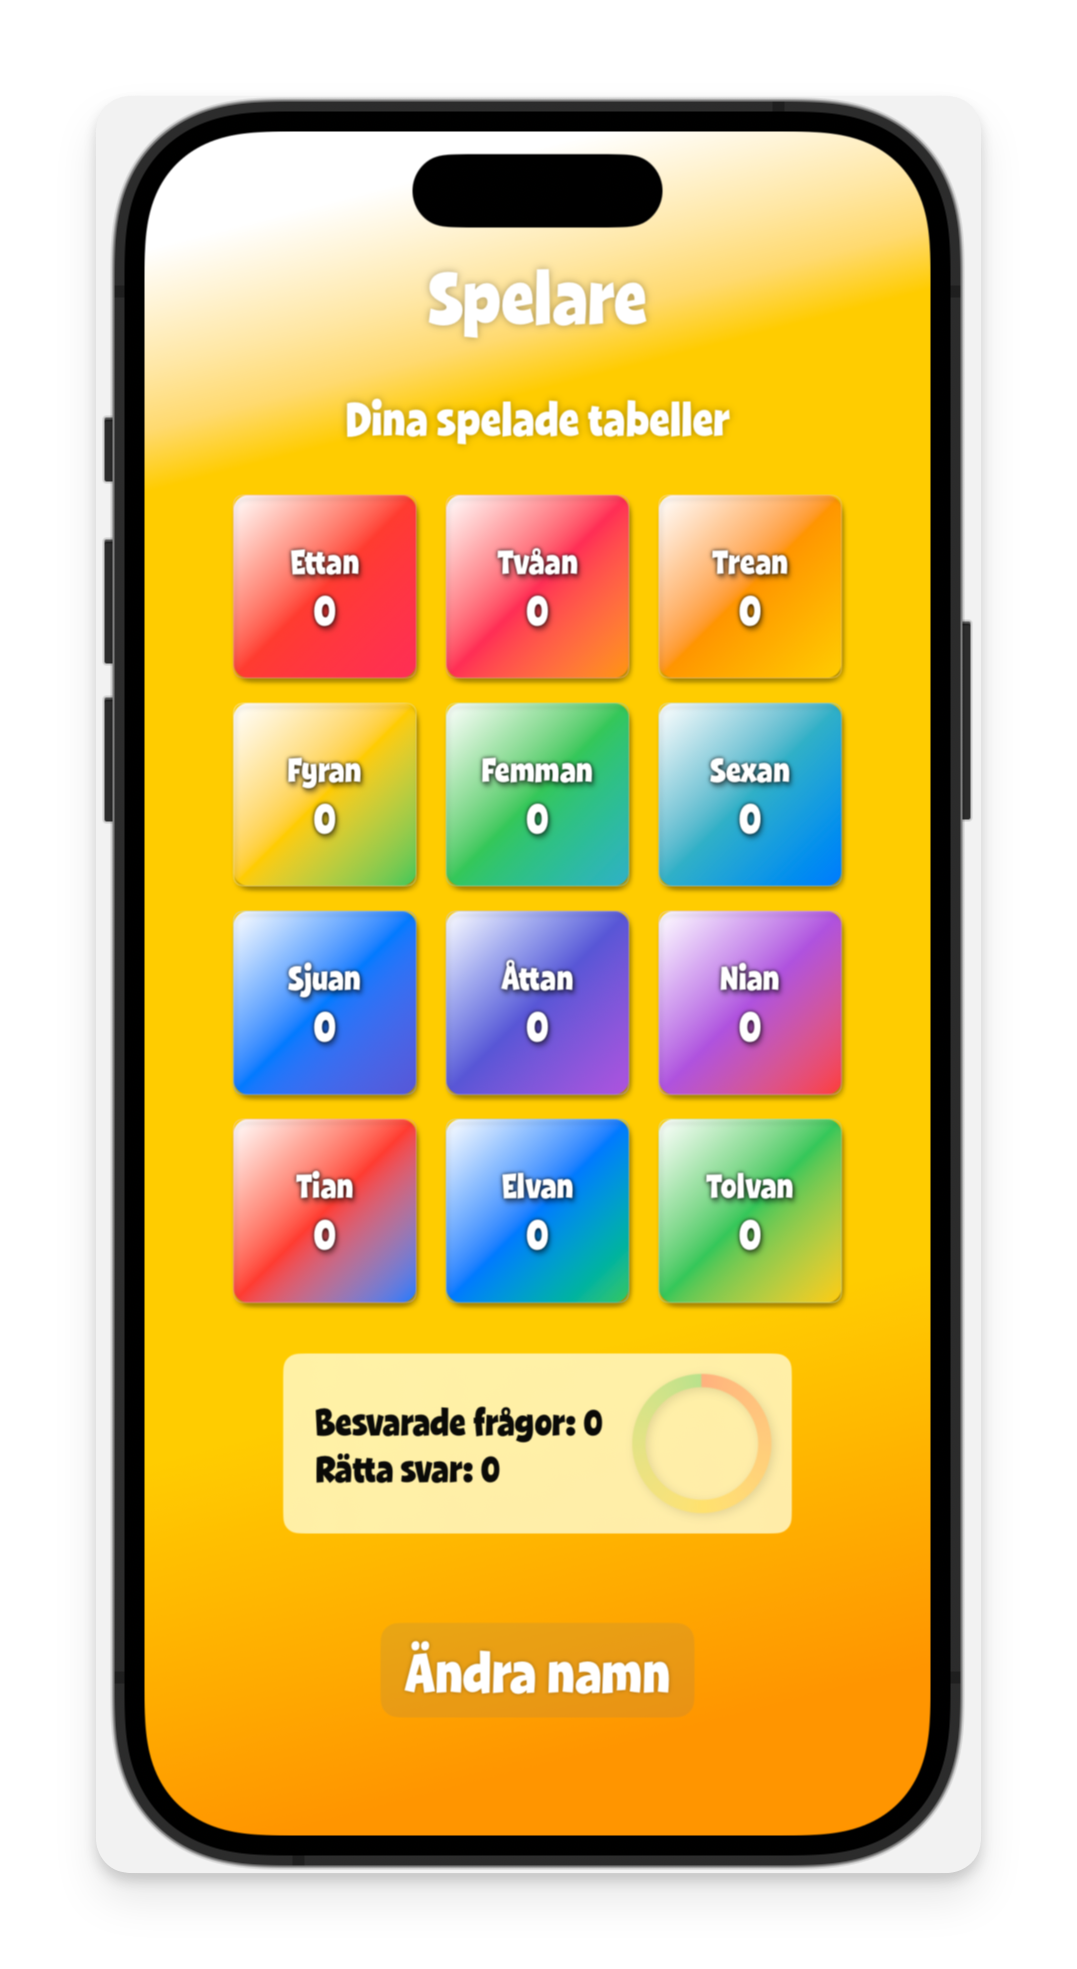
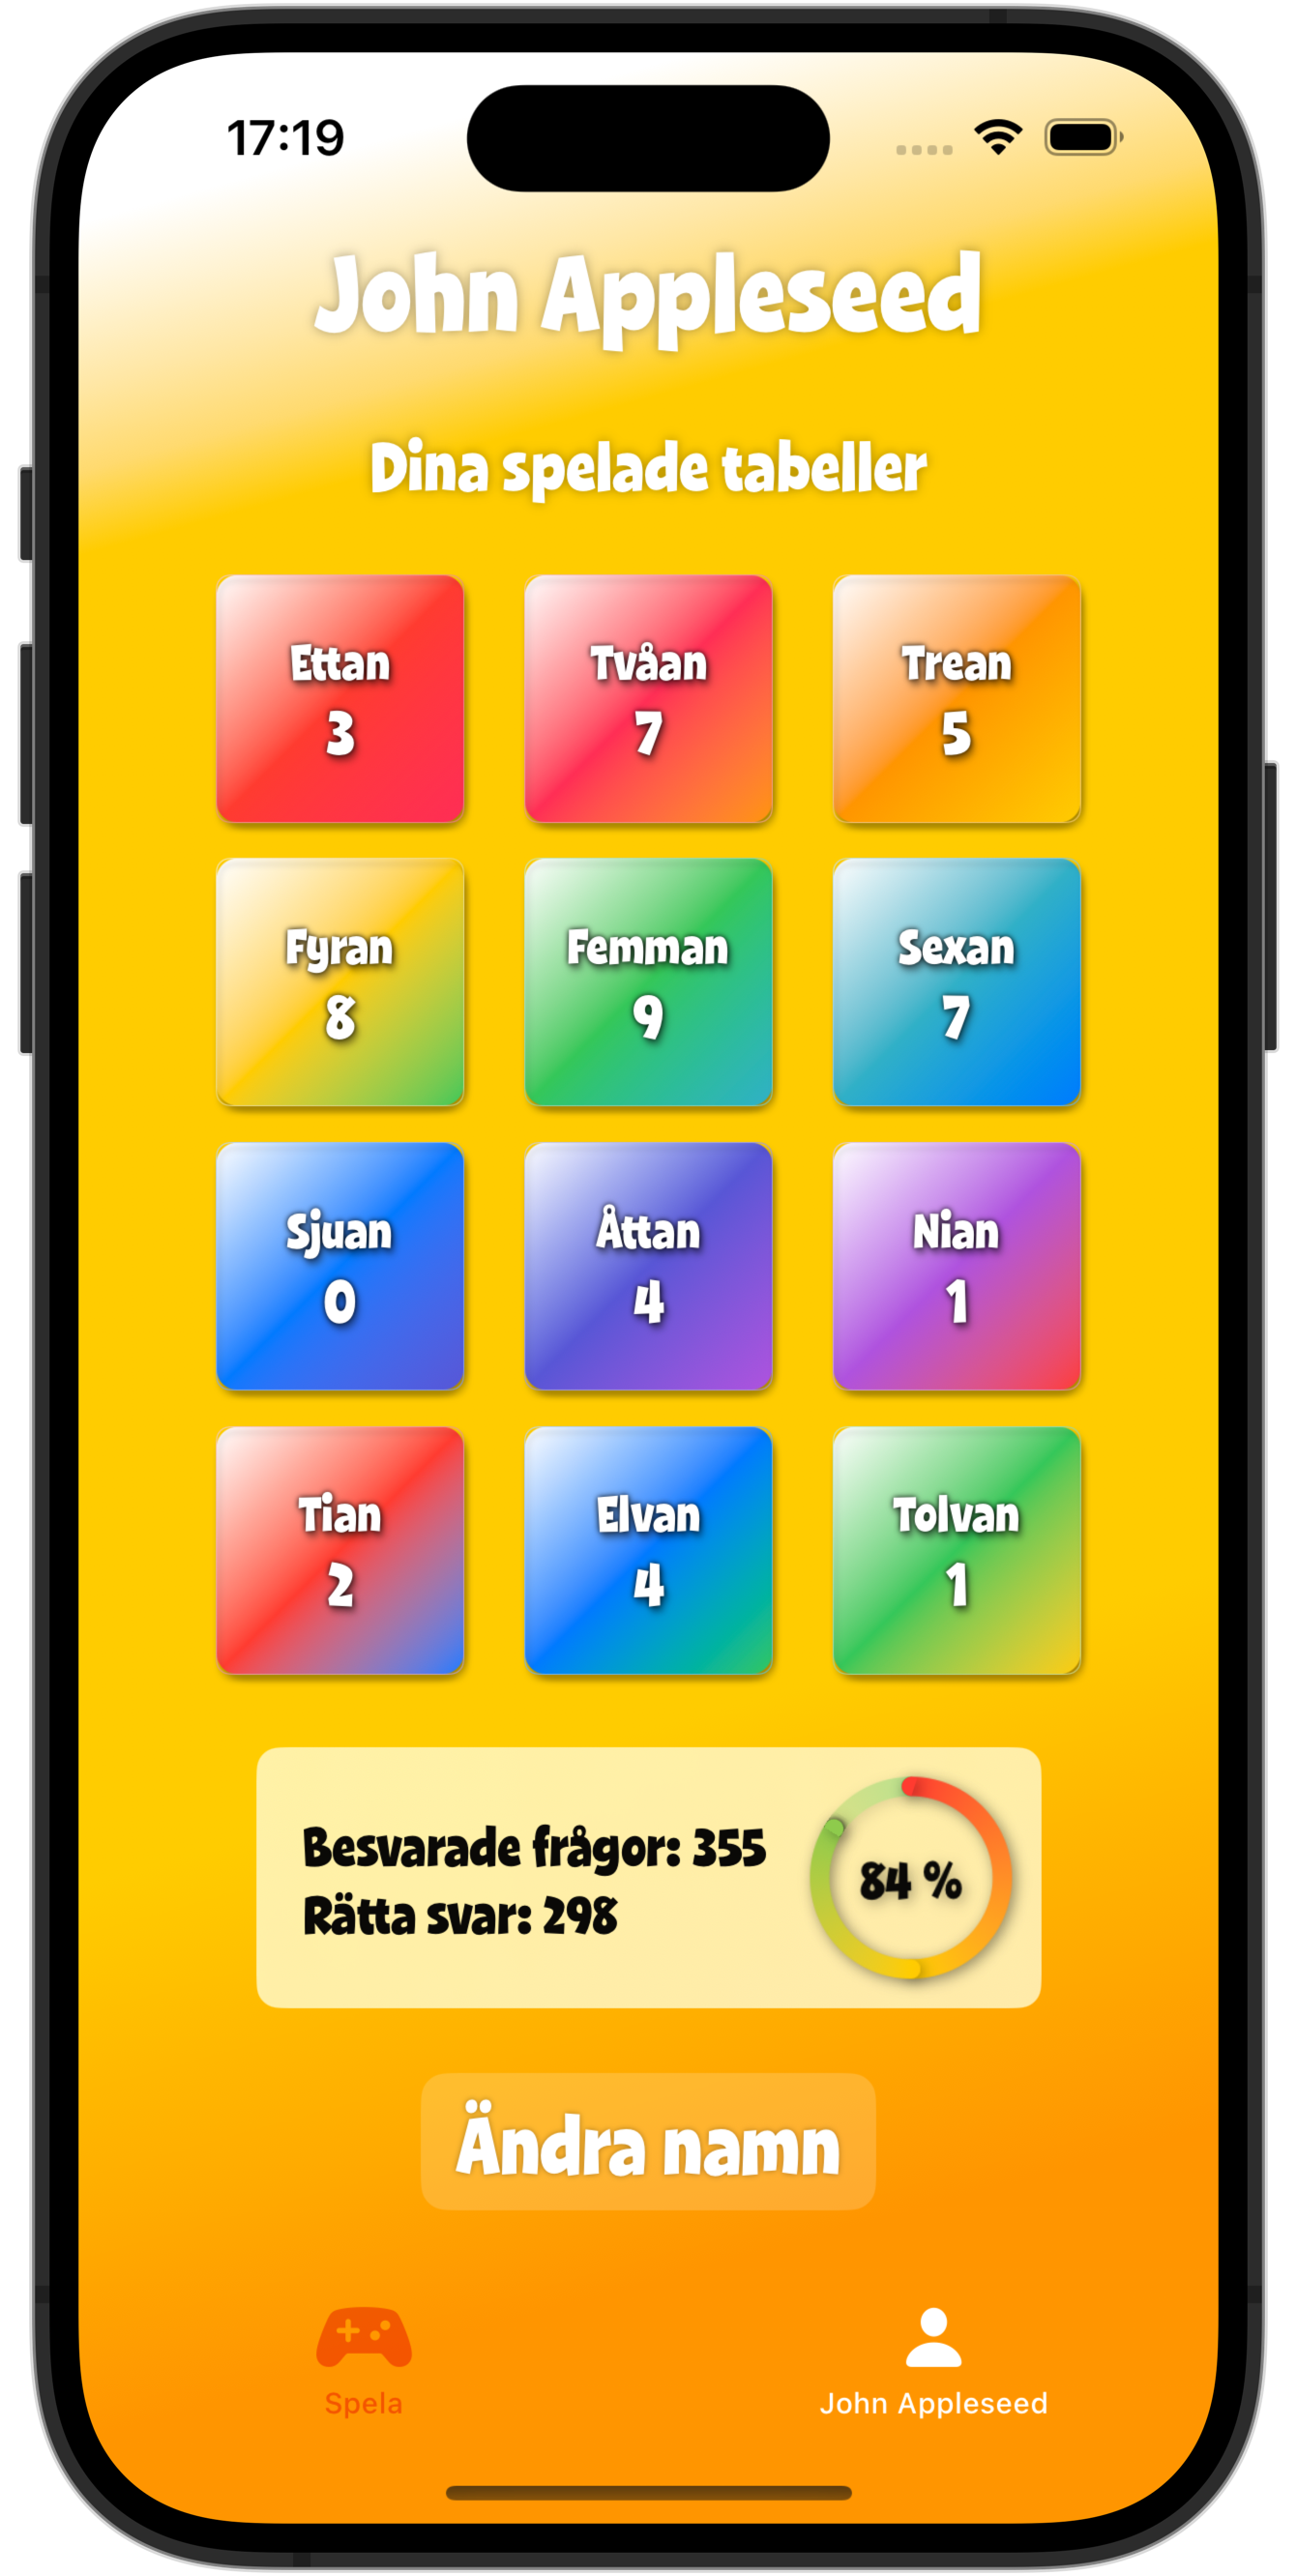
And then I got this lovely preview in Xcode, showing the apps state when it’s opened for the first time. No results, no progress and no player-name:
I needed to add some data, but how?
I knew that you can expand the #Preview macro by creating and returning custom structs and hoped that an init could be used to override the presets. That at least got the compiler to stop complaining, but instead the preview crashed, so not really a win.
I was almost ready to give up when I realised that if the preview is a simple View, the .onAppear-modifier should work just fine.
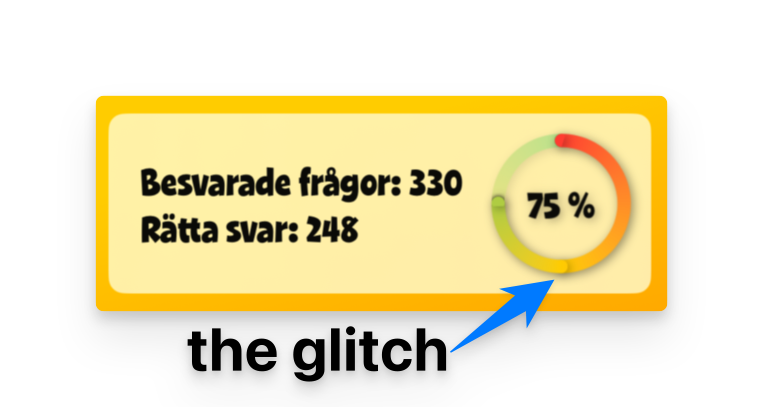
In hindsight, recompiling the app for every change – or better yet, refactoring the Player-class to allow passing values on creation – would have saved me a lot of time. Especially since the glitch turned out to be caused by applying a shadow to a Gauge with a gradient.
But at least I’ve learned something. And if you’ve painted yourself in the same corner as I did and found this post trying to find a solution, you may have as well.
PS. After writing this post I figured I’d probably benefit from having some mock data for simulator as well, to take away some of the pain that comes with creating screen shots for App Store.
So I just added an #if DEBUG to the method that loads the user default, that simply overrides everything with default values. And of course, with that in place I can go back to using the default #Preview-macro with .environment-injection.
No refactoring required.
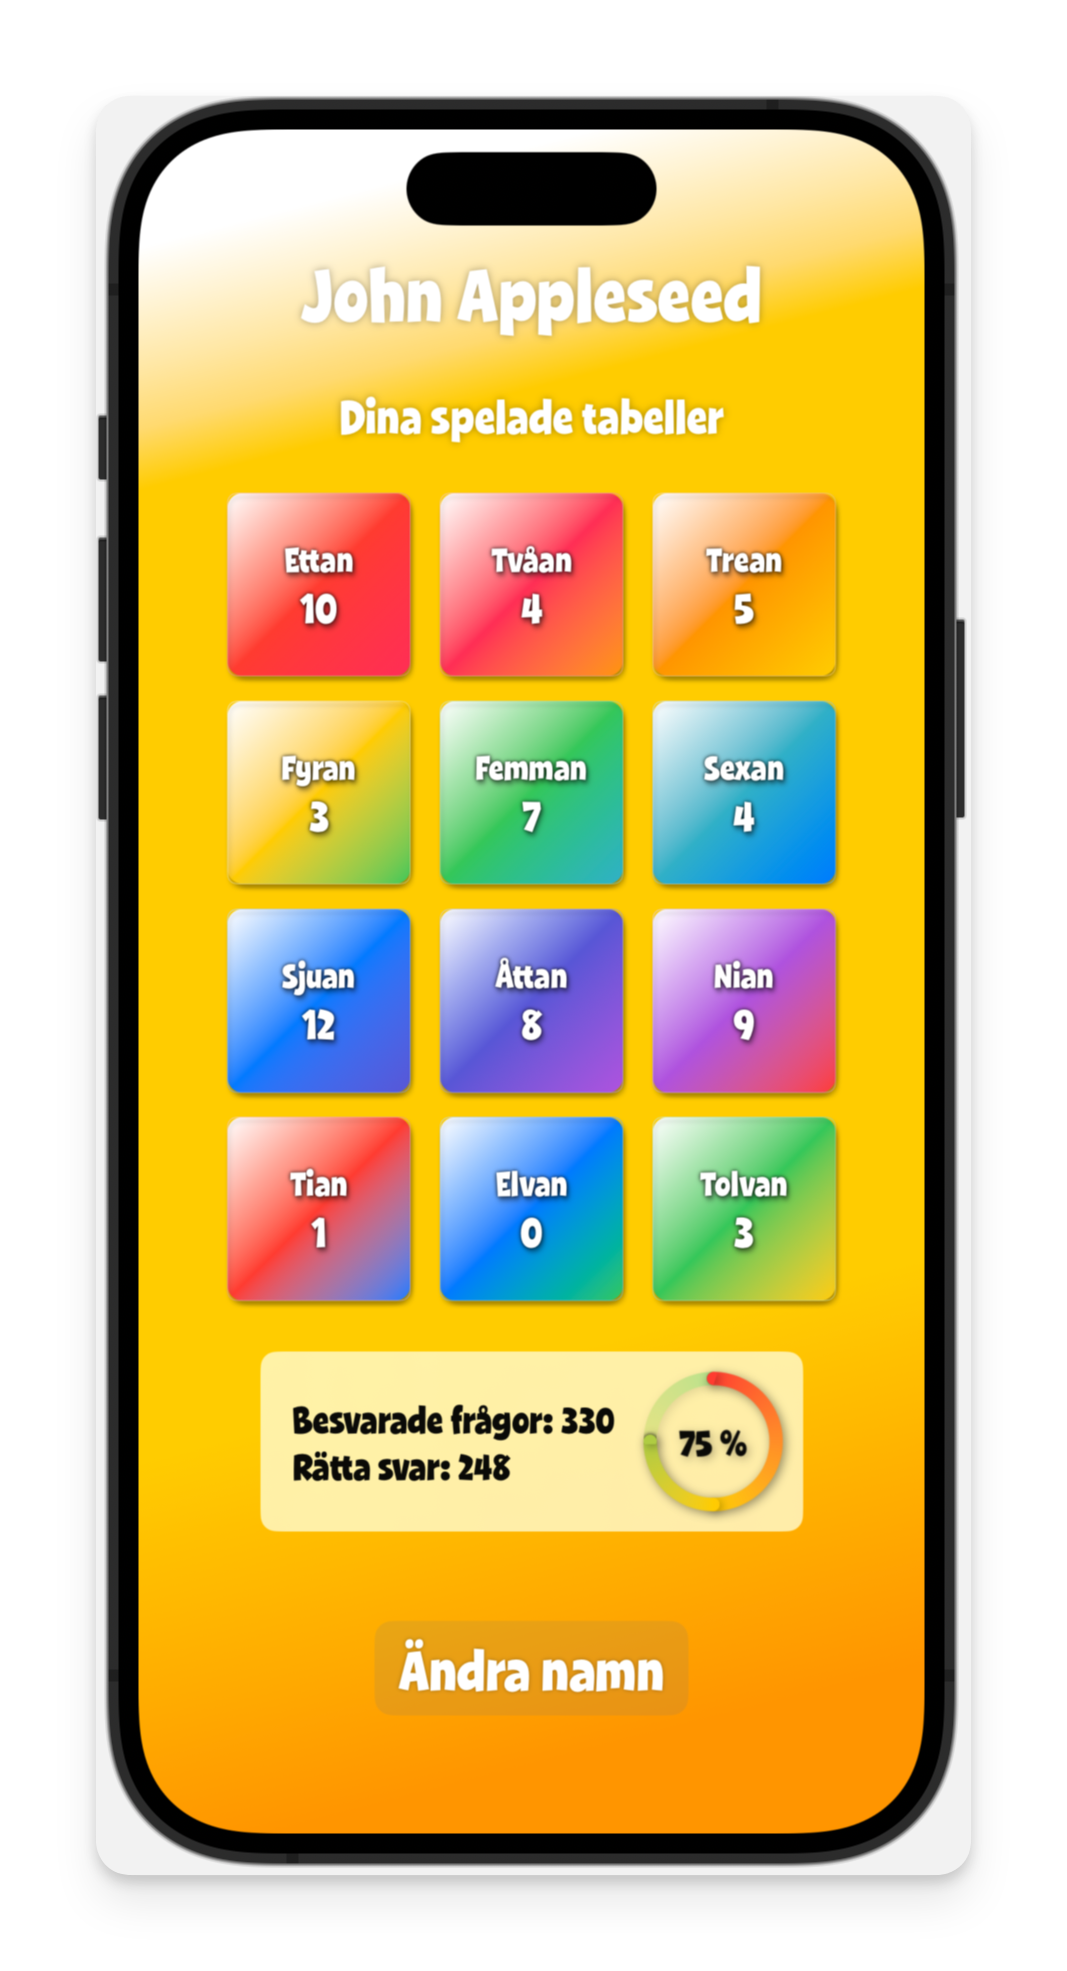
funcload() {self.name = defaults.string(forKey: Settings.name.rawValue) ??"Spelare"self.totalRounds = defaults.double(forKey: Settings.totalRounds.rawValue)self.totalScore = defaults.double(forKey: Settings.totalScore.rawValue)...// This is just for AppStore-previews. #if DEBUG name ="John Appleseed" scorePercentage =0.75 totalRounds =330 totalScore =248...}
The first code snippet I’d like to share comes from a simple game I created for my daughter. The origin is a challenge from 100 days of SwiftUI, where you are supposed to create an app for training the times tables. Back then I only got the logic working, but when she started with multiplications in school this year, she asked if could finish it for her.
At first I planned to get it on her phone with Test Flight, but it turns out that you have to be sixteen to install Test Flight. So I realised the only viable option was to go through App Store, and since that meant the app would be available to anyone with an iPhone I’d better put some effort in the interface.
With some input from my target audience I ended up with a gradient based theme, and now we’ve arrived to the reason for this post, the progress tracking view.
It’s a pretty simple table layout (or a LazyVgrid to be accurate) that shows how many times you’ve played – or practiced – each table, that is represented by different gradients, looking a bit like candy. Maybe that’s why my daughter likes them…
The code is pretty straightforward. Each table is created by calling a GradientView that takes a few arguments.
The only important properties to create the View are gradient, width, height and radius. The last two are used to pass in the text that is displayed and can be replaced with whatever fits your needs.
Then I simply call the view in a ForEach, inside my LazyVGrid.
There are a few things worth mentioning. First, I’ve created an array with predefined gradients to match the twelve playable times tables.
structGradients {staticlet gradients: [Gradient] = [Gradient(colors: [Color(.blue), Color(.yellow), Color(.red)]), Gradient(colors: [Color(.white), Color(.red), Color(.pink)]),Gradient(colors: [Color(.white), Color(.pink), Color(.orange)]),... and so on ... ]}
Second, the main view is wrapped in a Geometry Reader to make the layout automatically adjust to the current screen size, hence height/8, being passed to the GradientView. Since I want my buttons to be squares, I don’t bother using height and instead pass width for both properties.
I admit that this solution has a serious problem. If you can’t be sure that your ForEach will return the same number of indices on each run, using a fixed set of pre defined gradients is probably not good idea, unless you want your app to crash. But an easy fix could be to use the modulo operator and have the gradients repeat when you run out of them.
I admit that you could probably find a smarter solution, but if want to become a contributor to the swift community, I’ll have to start somewhere.
It’s been more than thirteen years since my last post, and I think it’s time for a reboot.
The reason is that a few years ago I discovered Hacking With Swift and decided to give coding another try (last time was back in the days of the C64) and finally have reached the stage were I may have something to give back to the community.
You shouldn’t expect in-depth tutorials in this blog, at least not for now, but more of a code journal where I document things I’ve learned along the way – especially if there’s a problem where the solution wasn’t easily found on the we.